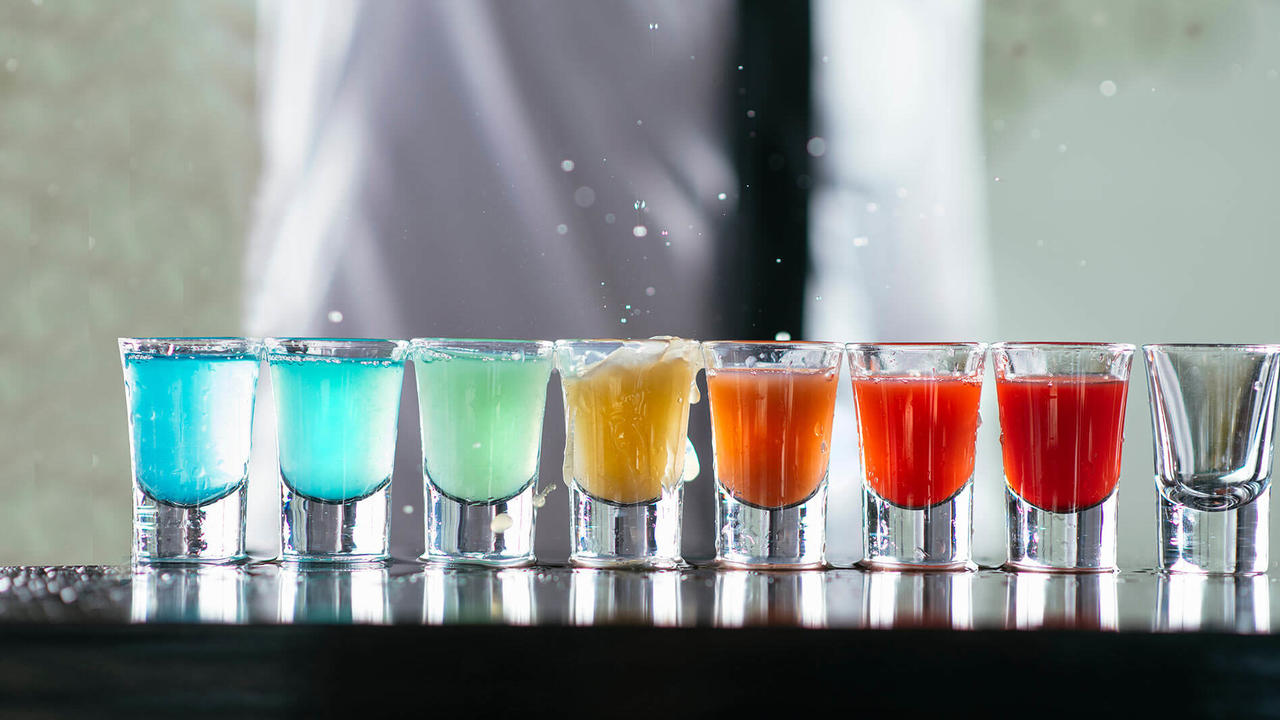
Here, at European Bartender School, we like to impress and surprise our guests. What better way to do so than with rainbow shots? Unfortunately, it’s not magic, just some simple physics.
Want to know how seven different colours pour out of one tin? The method for rainbow shots is very easy and only five steps...

How rainbow shots work
It’s very simple. The three main liquids all have different densities, which allows them to separate and stack up in the jug naturally. As the mixture is poured out into shot glasses, the colours blend a little and create an awesome, 10-shot rainbow. The best thing about this trick is that it is super simple to perform, so once you know how to do it, you can show it to your friends and watch their jaws drop!
Equipment
- 10 Shot glasses
- Cocktail tin or jug
- Julep strainer
- Spoon (bar spoon or tablespoon)
- Cubed ice
Rainbow shots ingredients
- 100ml fresh smooth orange juice
- 50ml Grenadine
- 30ml Blue Curaçao
NOTE: You can add vodka to this recipe. We will explain how to add this ingredient properly in the method.
Easy rainbow shots method - 5 steps
Our method behind making rainbow shots are just five simple steps. Remember the order and you can't go wrong!
Step 1 – Pour grenadine

Pour the grenadine into your cocktail tin or jug first. We used a jug in our tutorial. This is the final layer that will pour out for the rainbow shots. The grenadine is also the heaviest, so the other liquids will sit on top of it.
Step 2 – Ice up the jug

Now the grenadine has been added, fill up the jug with ice to the top. Now, you're ready to pour the rest! This is important to the structure as it keeps the layers in place. The ice makes it harder for the layers to mix. We recommend cubed ice over crushed ice because the layers remain more stable.
Step 3 – Add orange juice

Pour the orange juice onto the back of a spoon into the jug gently and slowly. By doing this technique, the orange juice and grenadine don't mix together.
Step 4 – Top with Blue Curaçao

Place the Julep strainer over the top of the jug and pour the Blue Curaçao onto the back of a spoon to top. This means that the Blue Curaçao is not disturbed and has a smooth entry to sit on top of the orange juice. The different densities of the two liquids stop any mixing from happening.
Step 5 – Pour into shots

Now, the jug is layered and the rainbow shots are ready to be poured. Set out the shot glasses in a line. Gently pour the mixture out of the jug to fill each shot. Make sure you continuously pour during this bit, so that you don’t disturb the layers. If you stop pouring and place the jug upright, the layers mix together and your rainbow will vanish.
Once you've poured, you’re done! Enjoy your newly created rainbow…
If you're looking for a more visual mode of learning, here's our rainbow shots tutorial on our YouTube page!

NOTE: If you want a boozier set of rainbow shots, you can add vodka just after pouring the orange juice. In this case, use 80ml fresh orange juice, 40ml vodka, 40ml grenadine and 30ml Blue Curaçao.
A fan of pineapple? You can also add pineapple juice to this mix. Simply split the amount of orange juice by half and replace the remaining half with the pineapple juice, for an even fruitier set of shots.
Read about the best cocktails to make at home, for more inspiration. Or learn some more recipes in our Christmas shot recipes blog!
Feel inspired to get behind the bar? Take a look at our bartender course and start your bartending journey today...

